Adding and Using the new Facebook Pixel
The new Facebook pixel allows you to use a single ID for conversions and retargeting.
You can now track several types of events: “purchase” “add to cart” “view content” and “initiate to checkout”.
-
How to install the new Facebook pixel
Go to your Ads Manager, click on tools, then pixel and then select “create a pixel”
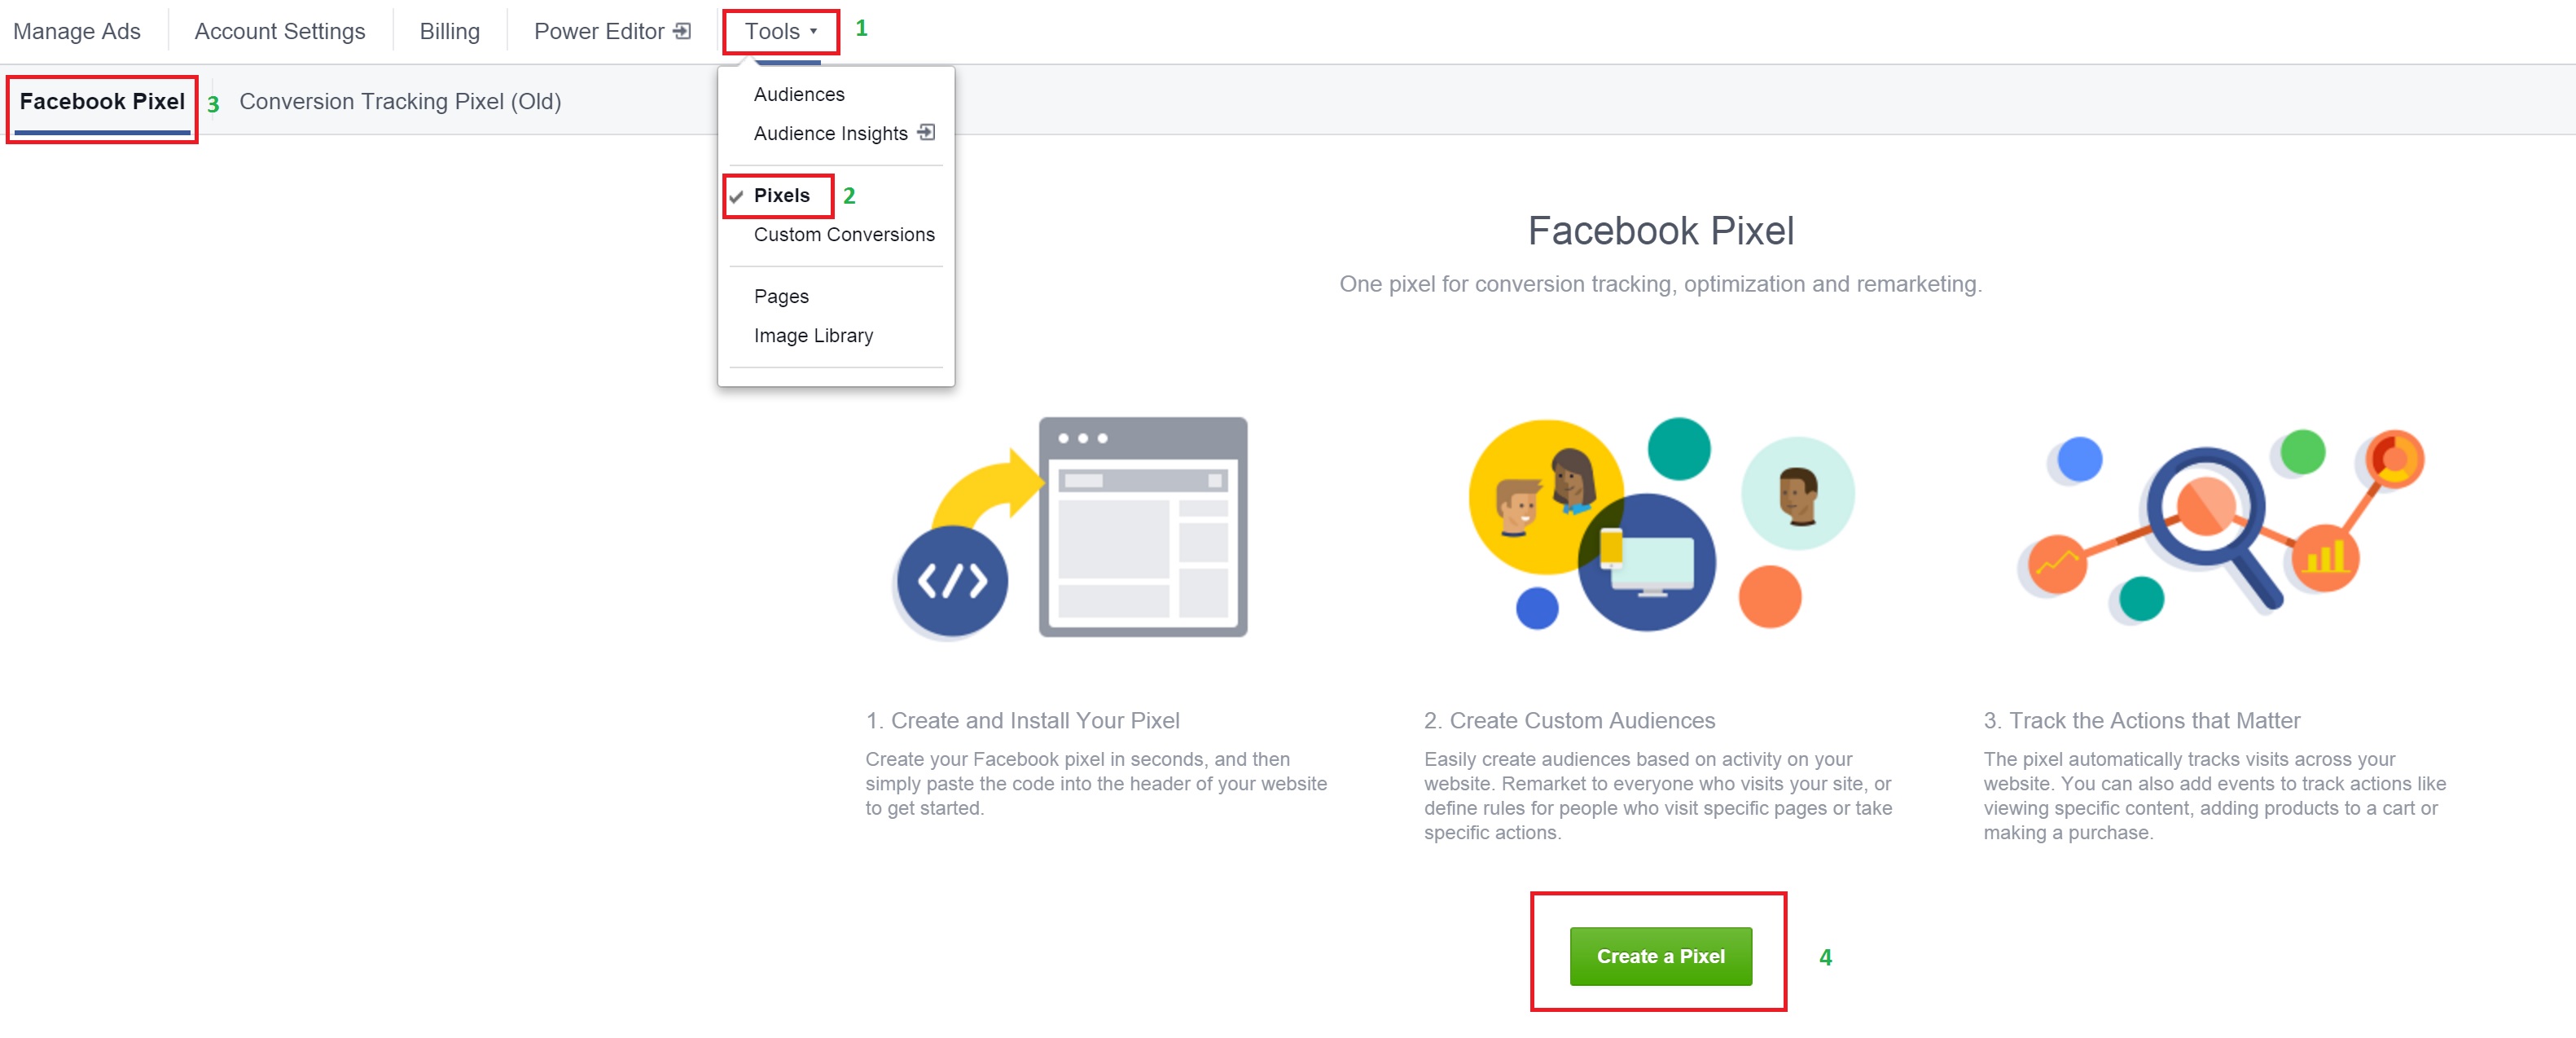
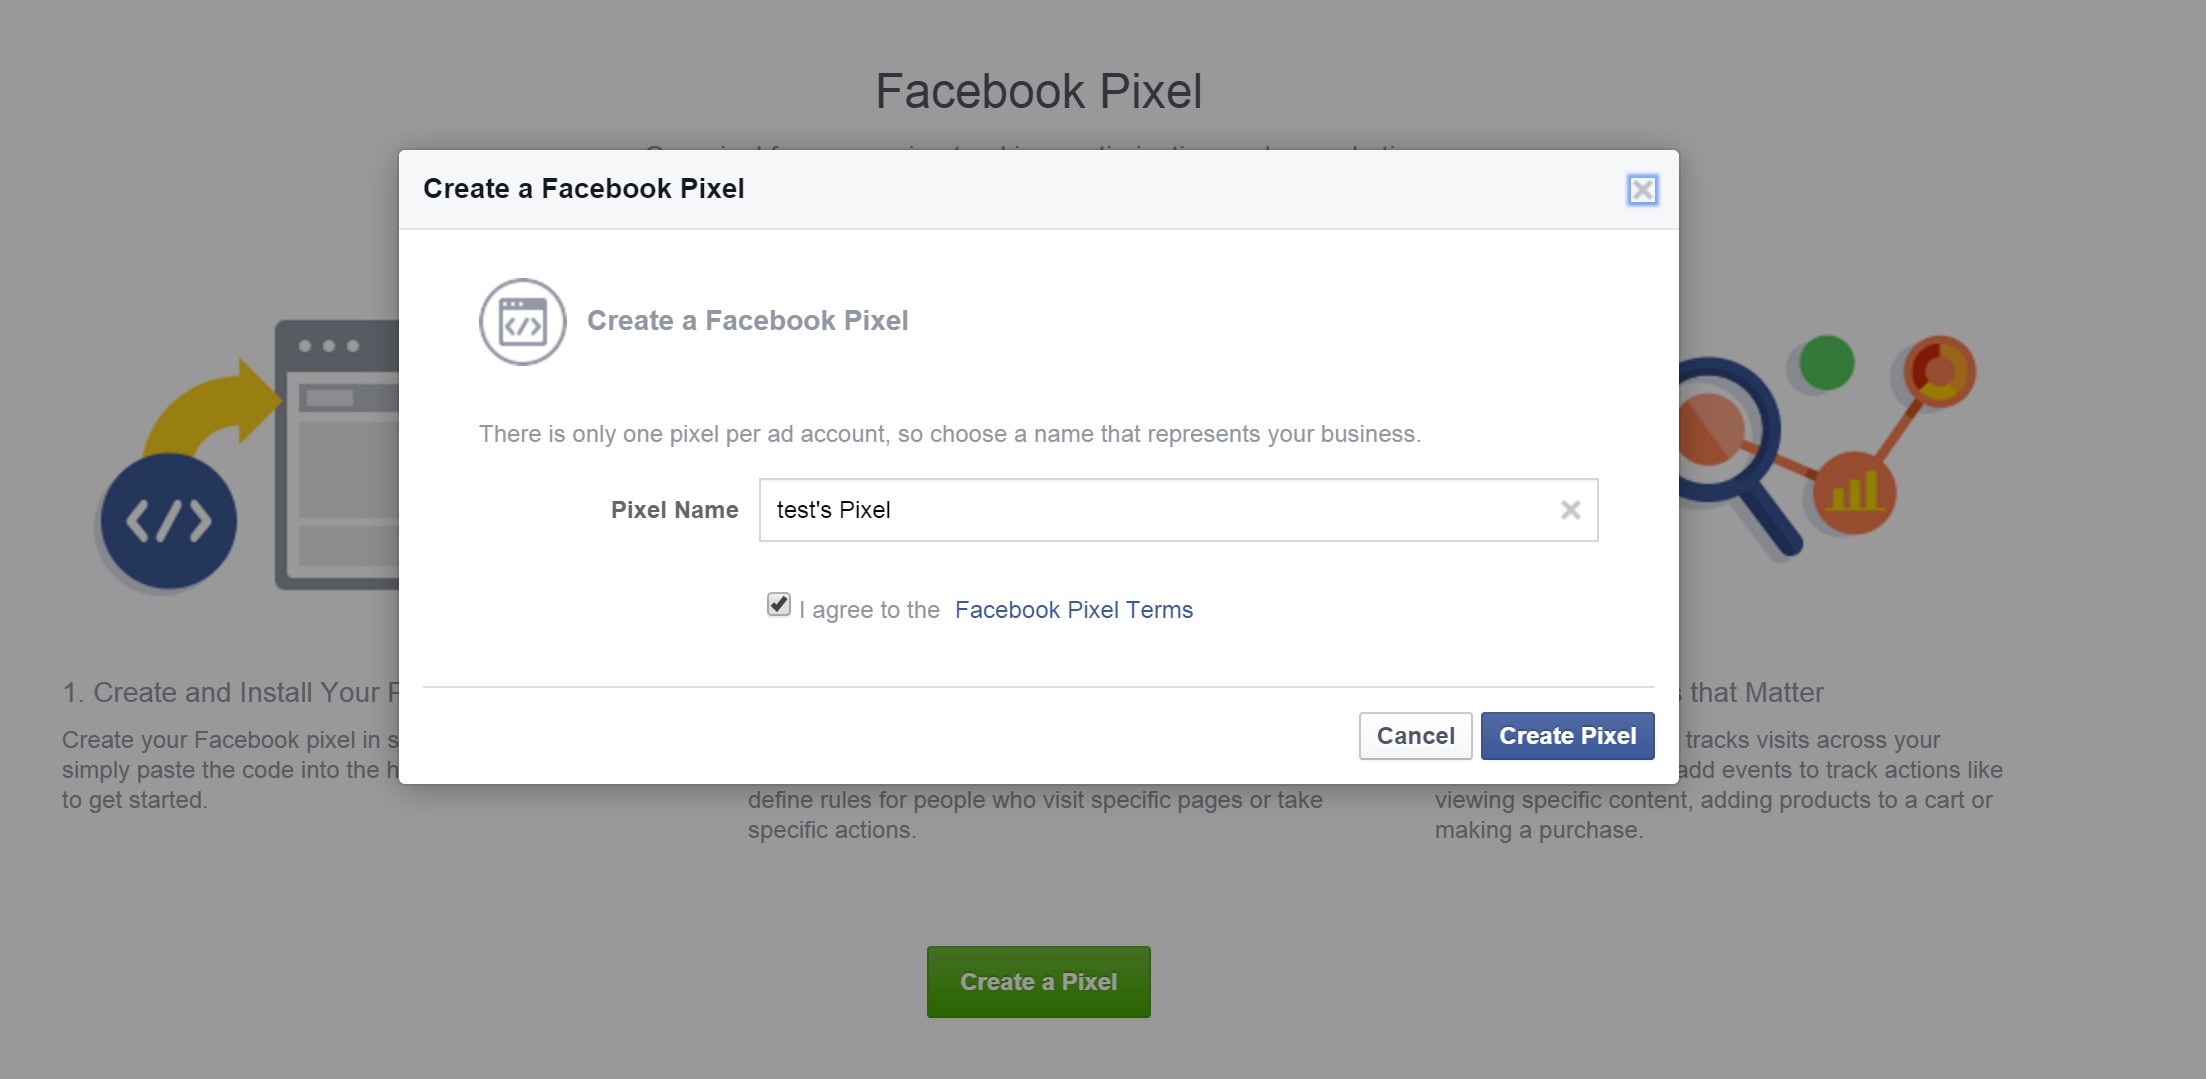
Give a name to your pixel and click on Create Pixel
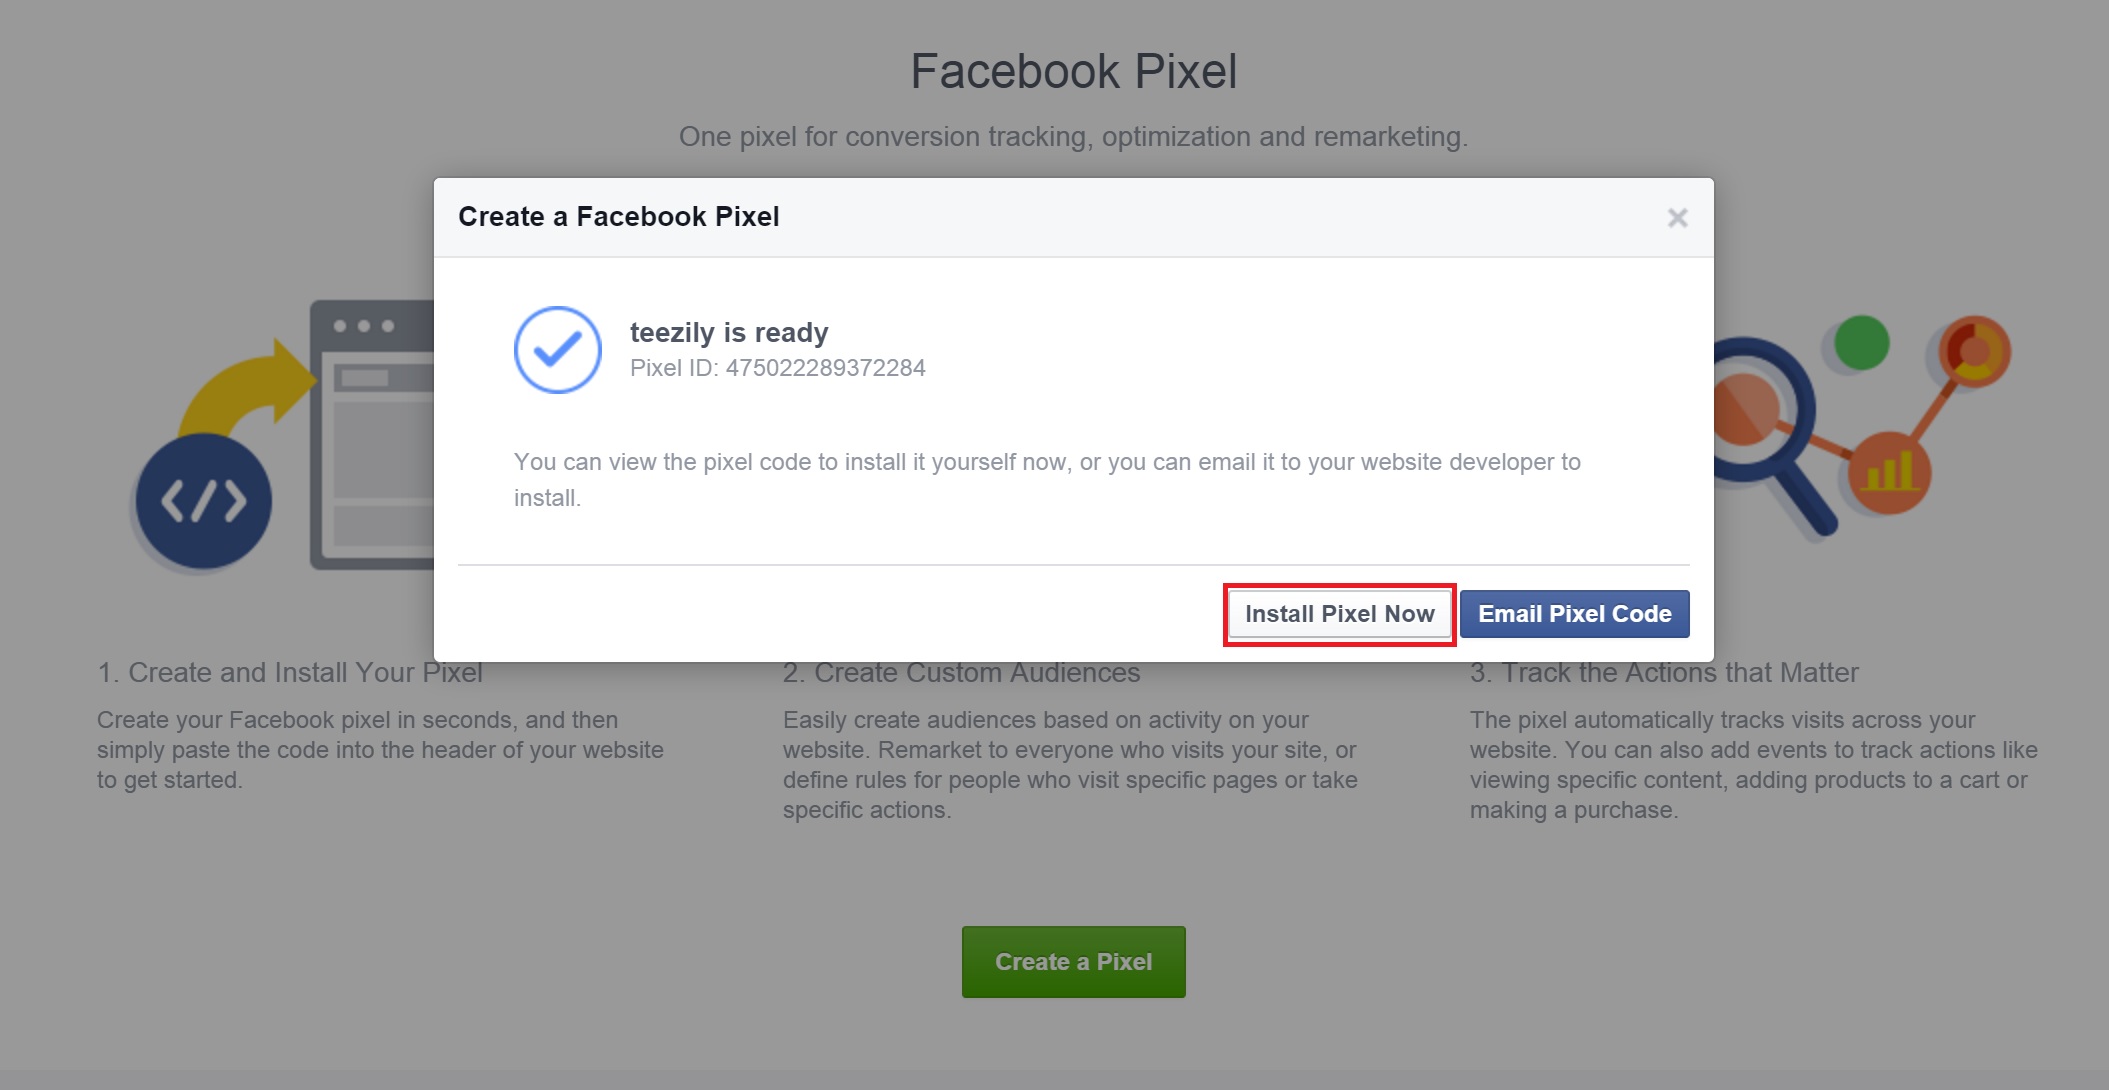
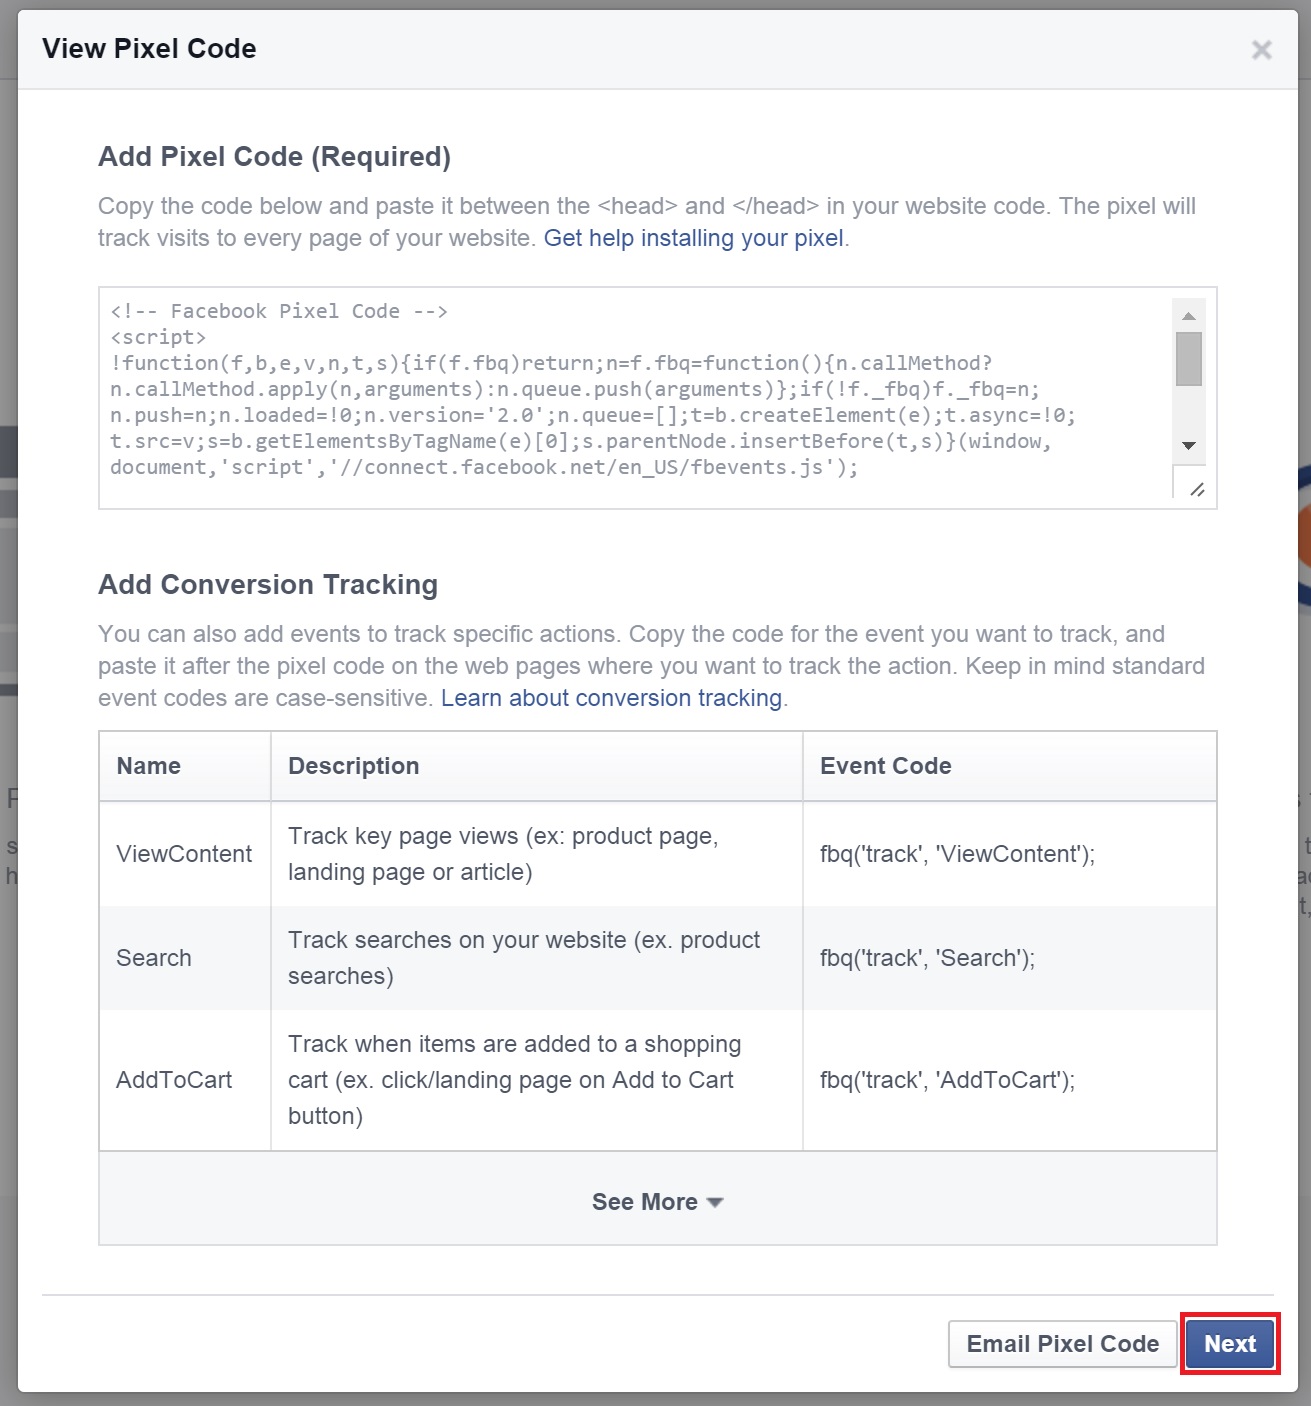
Click “Install Pixel Now”
Click Next
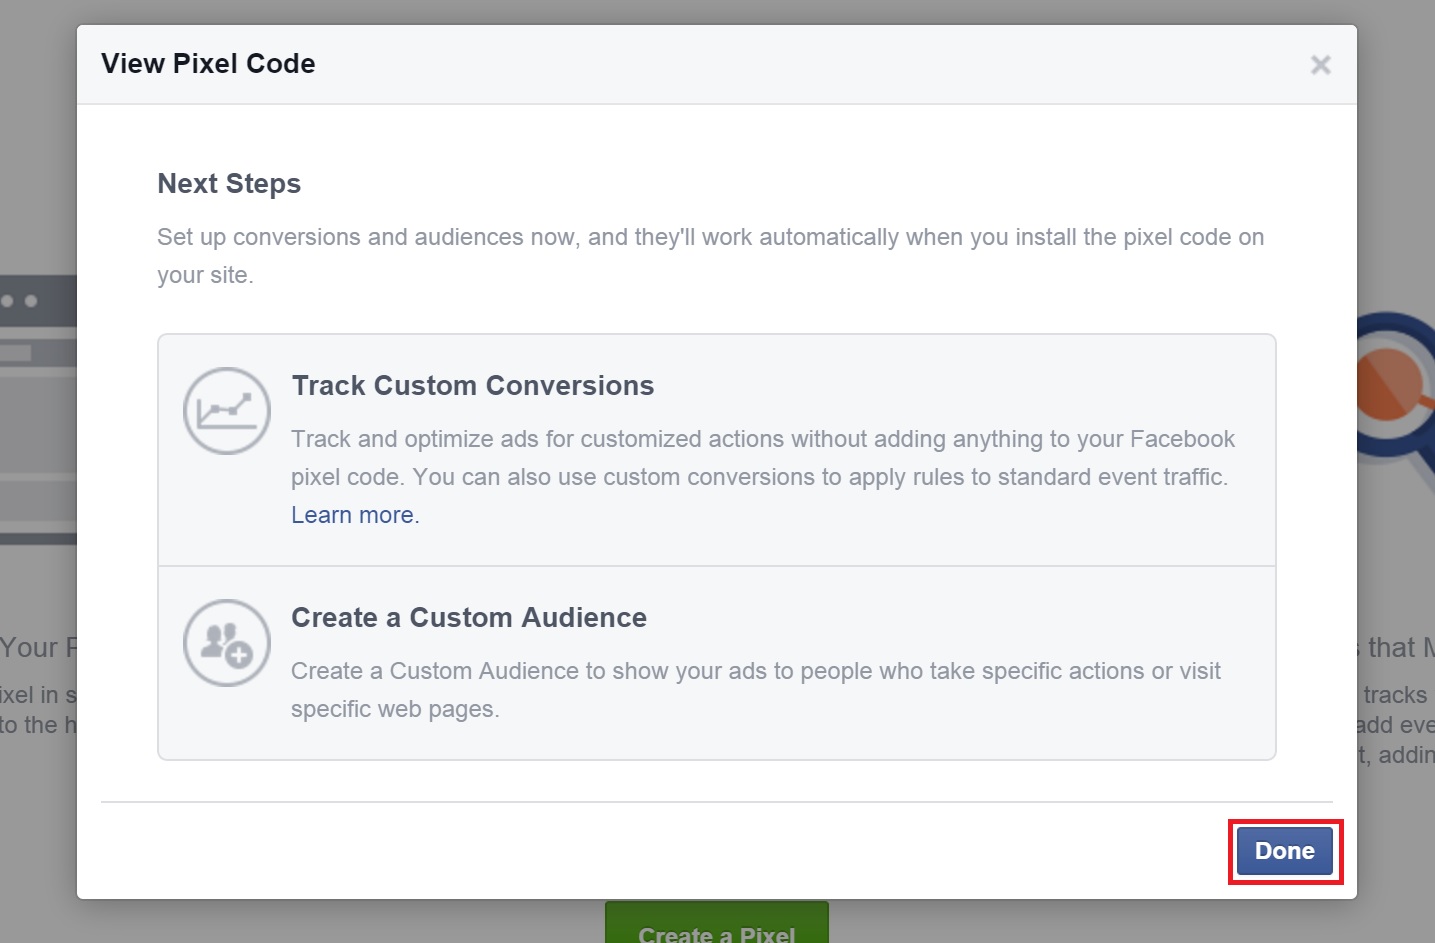
Then click Done
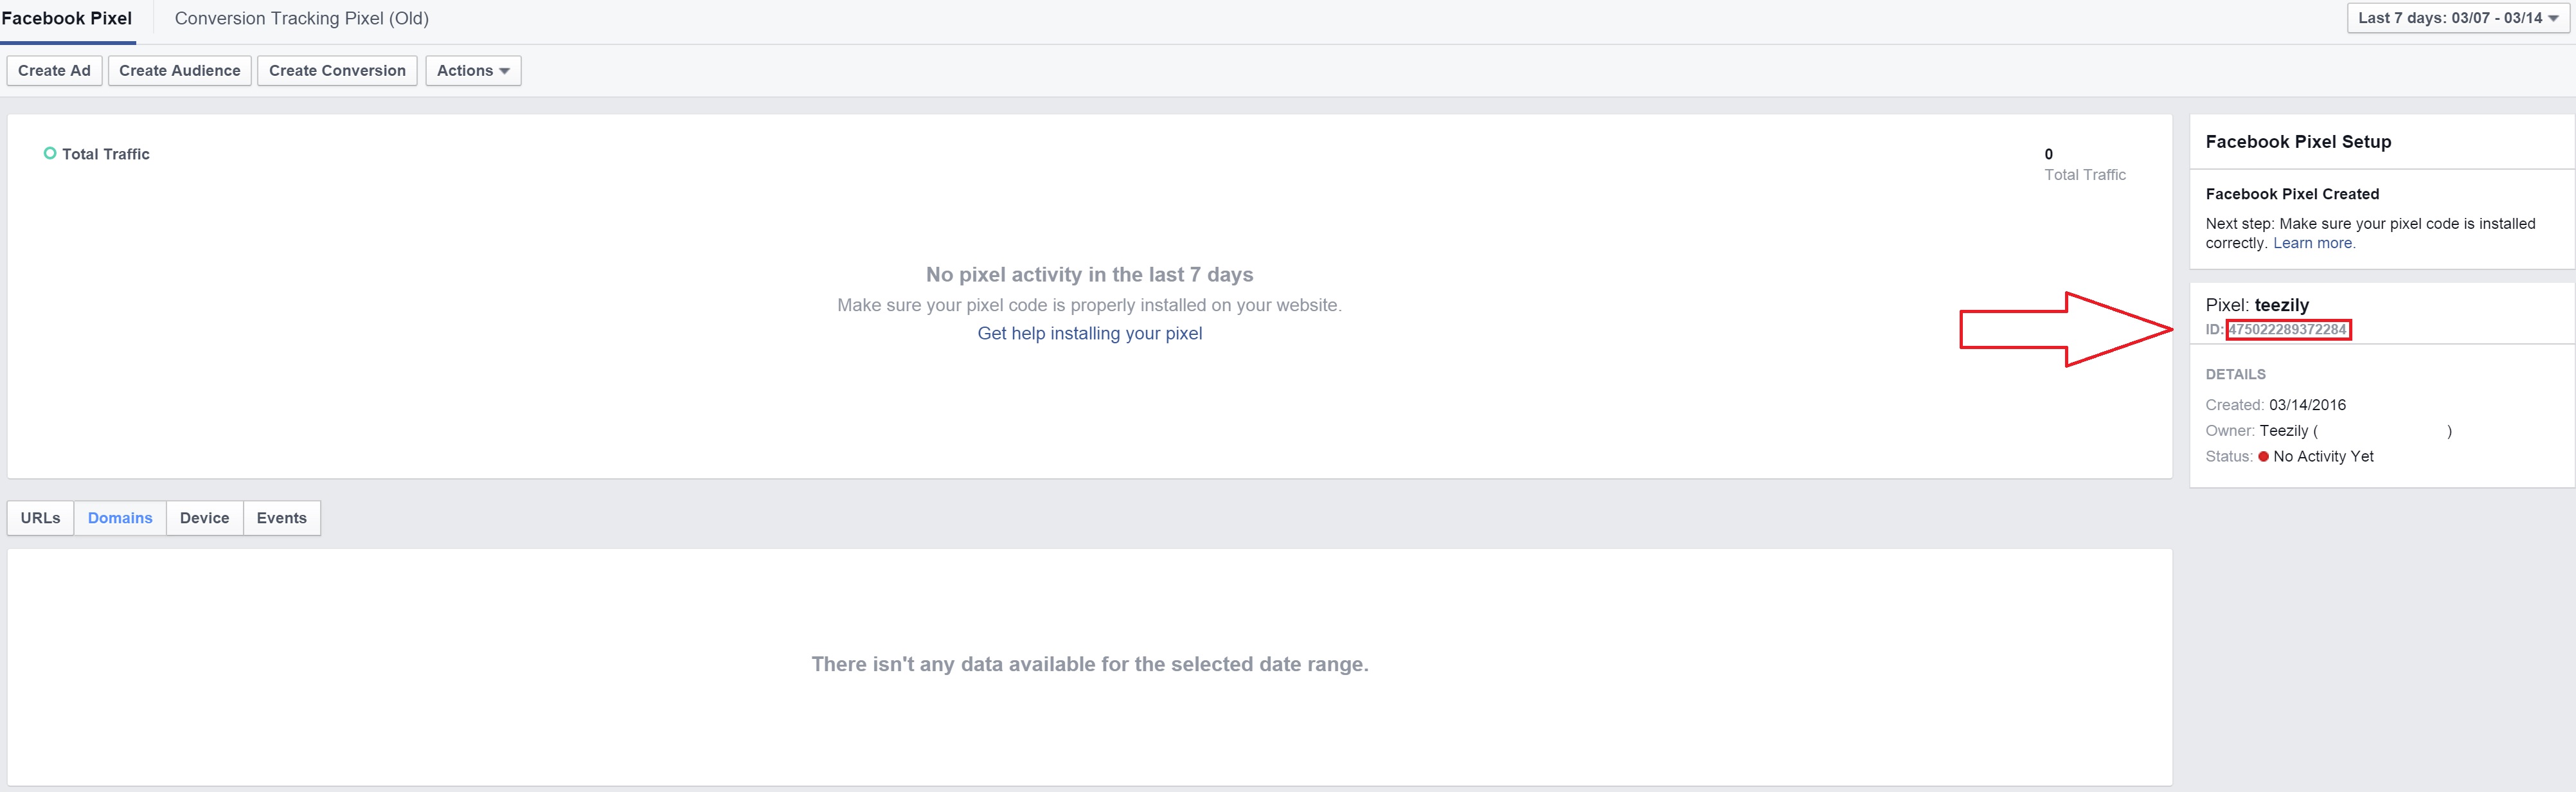
Copy the Pixel ID
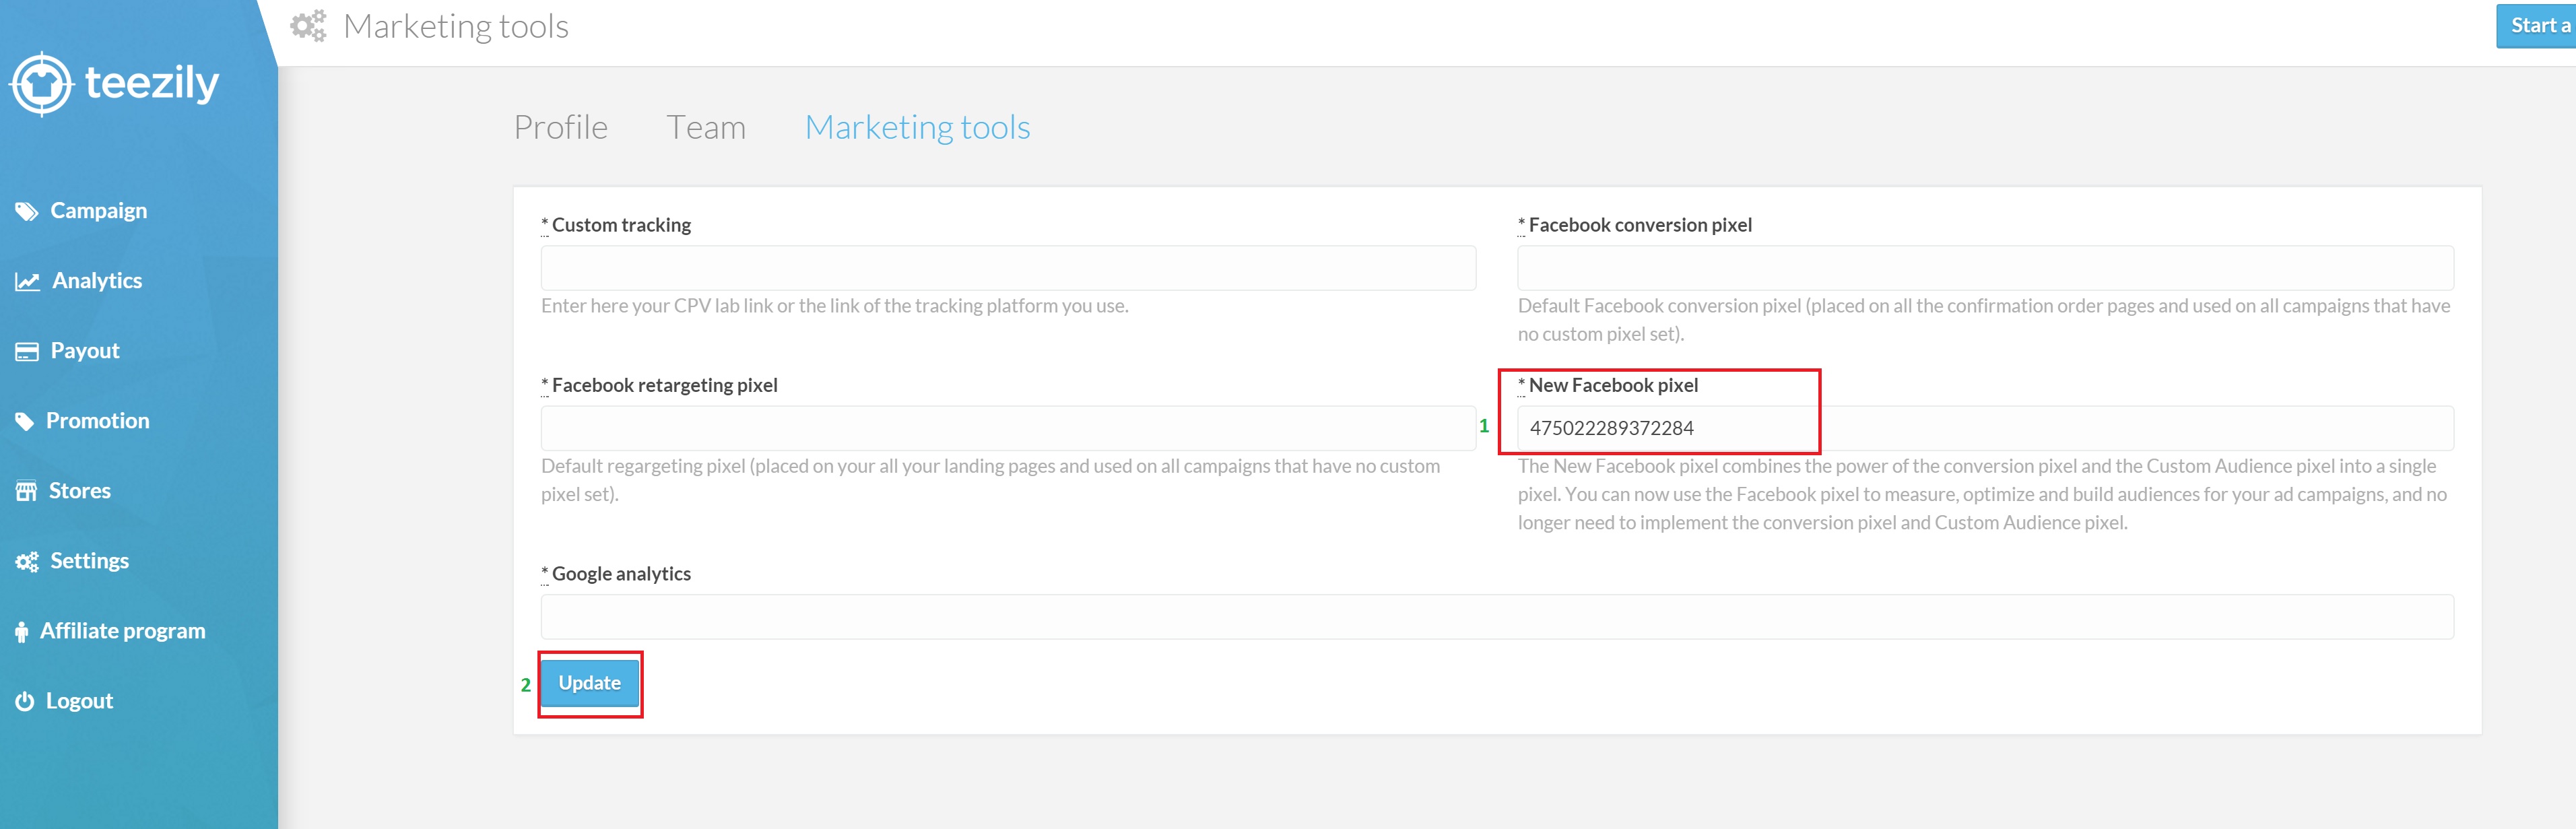
Paste the ID in your Teezily back office and click on Update
-
How to use your new Facebook pixel
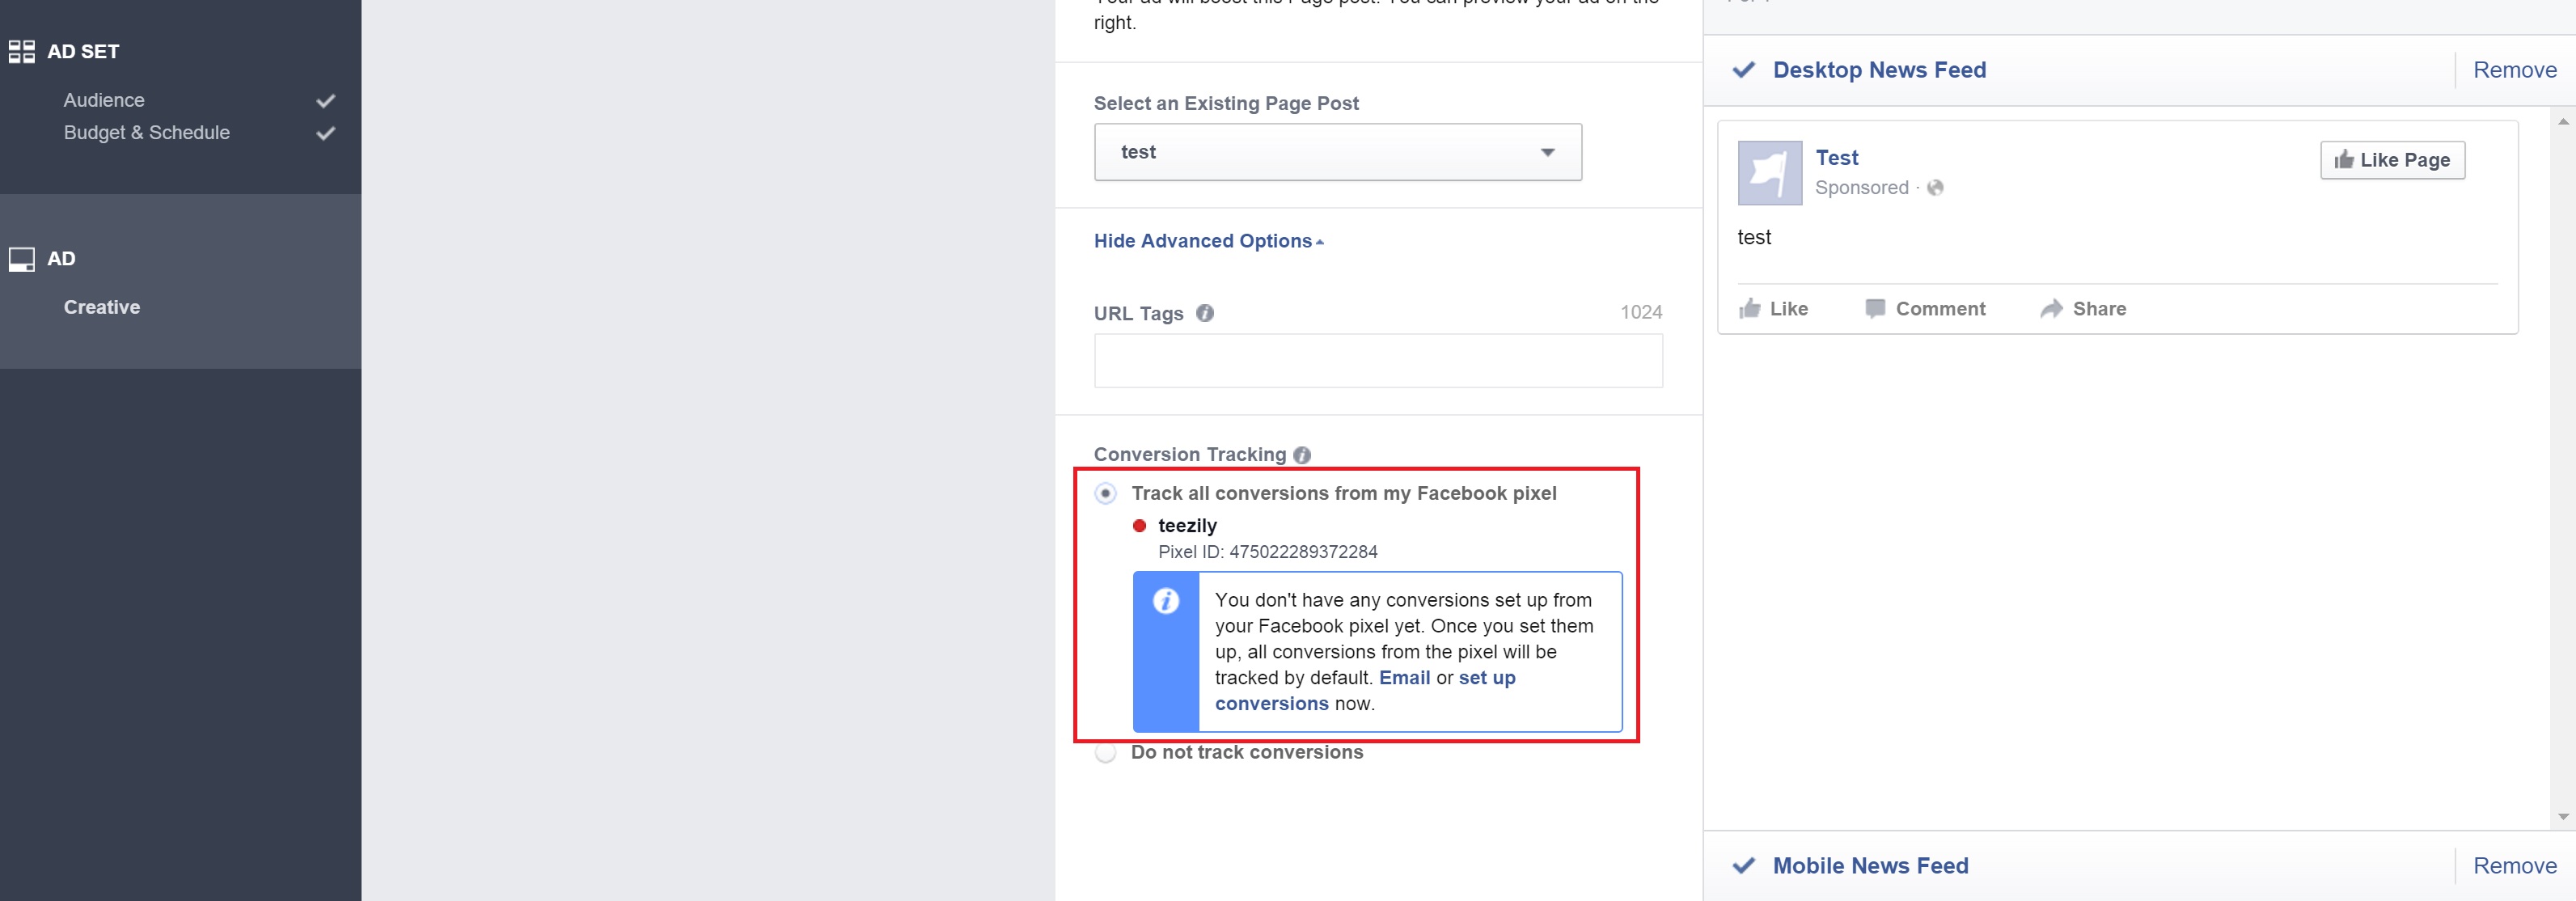
If you create a PPE ad, click on creative ” Track all conversions from my Facebook pixel”
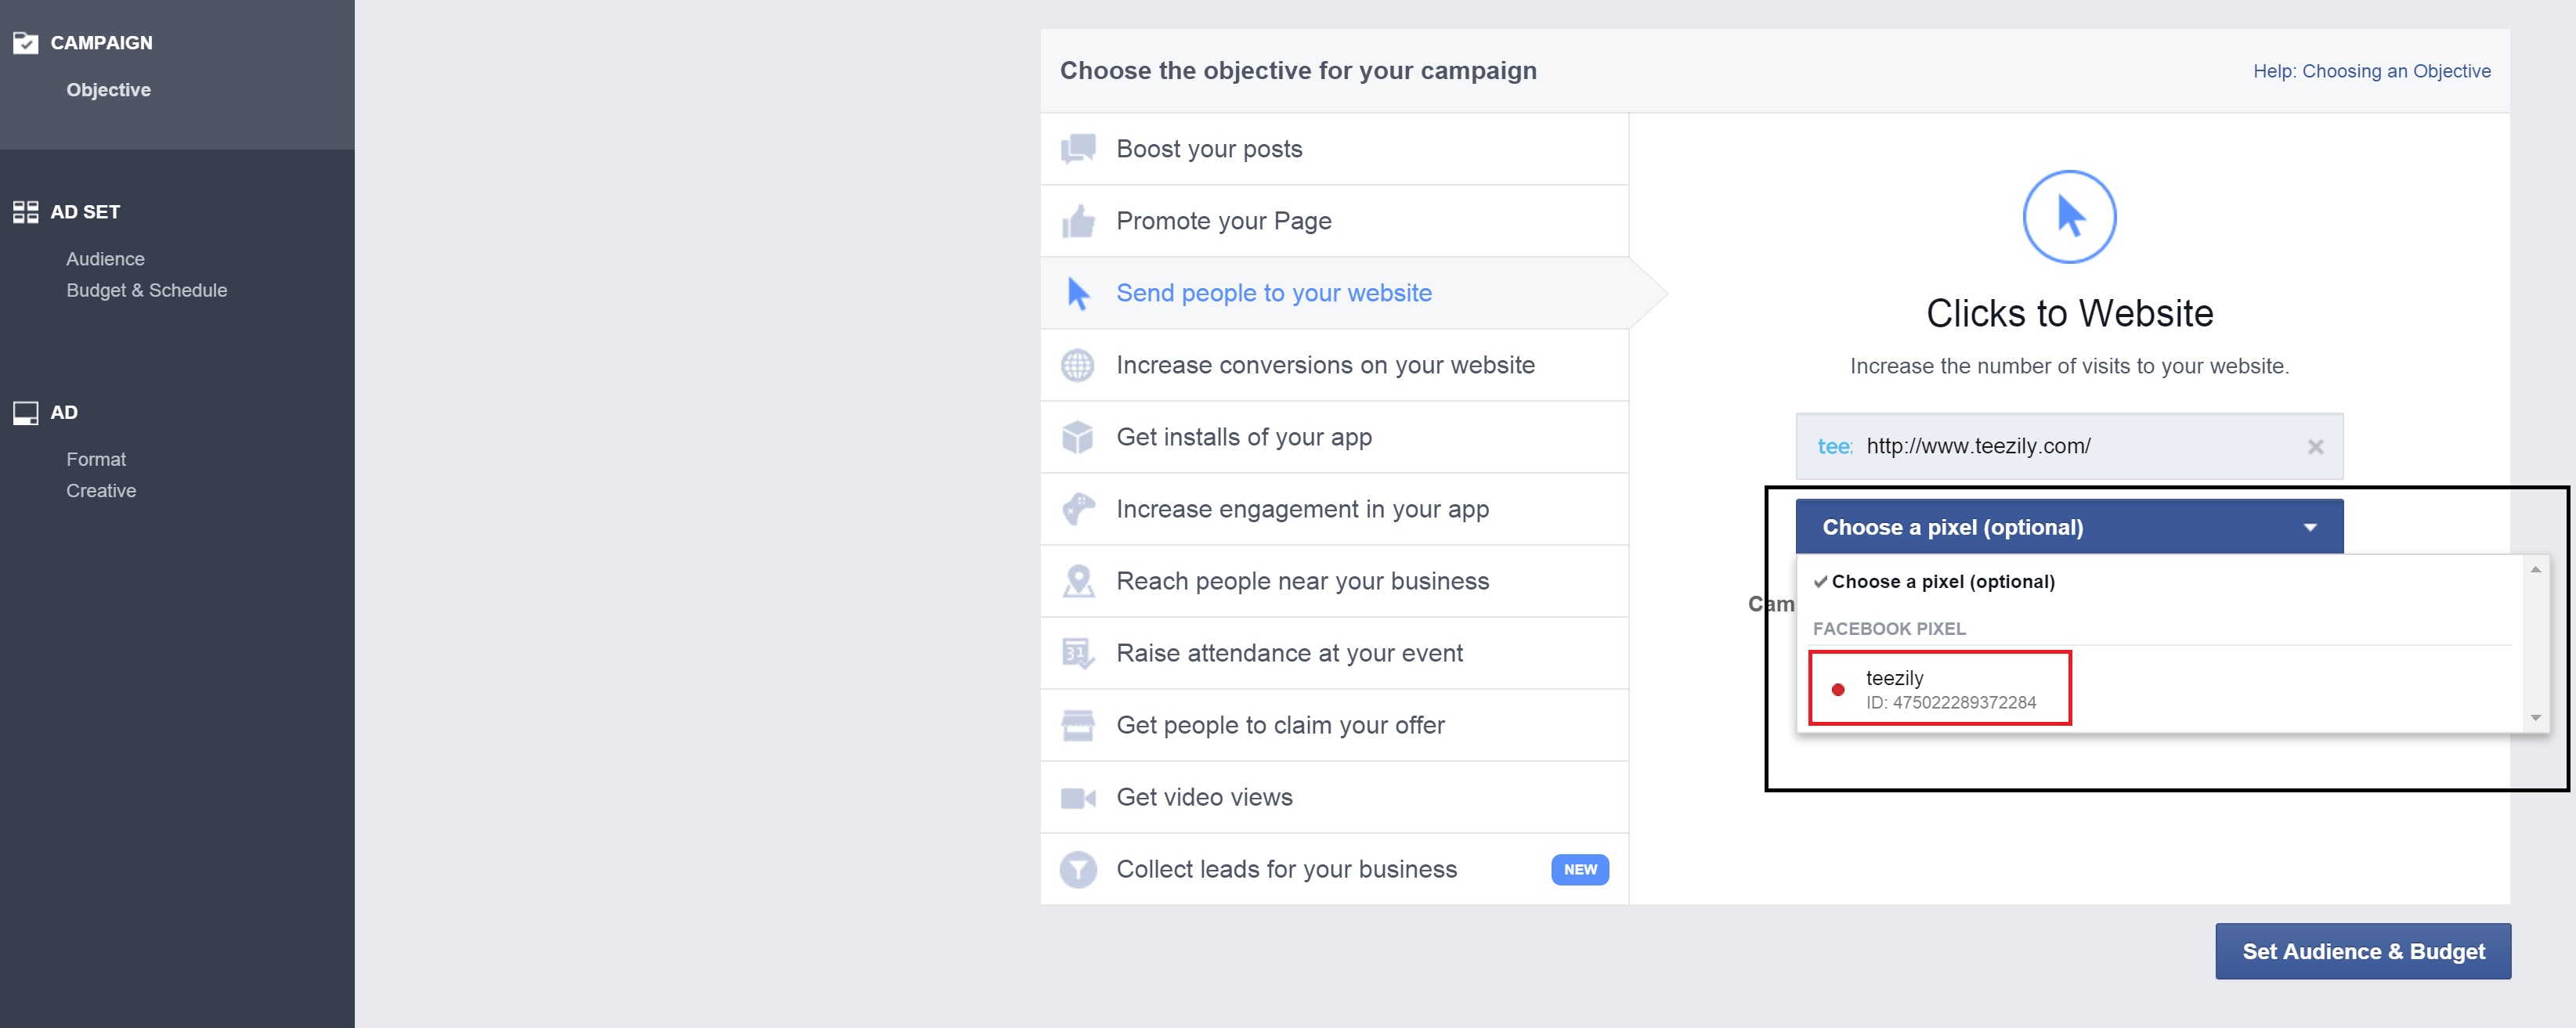
If you create a Clicks to Website ad, select your new pixel in the section “Choose a pixel”
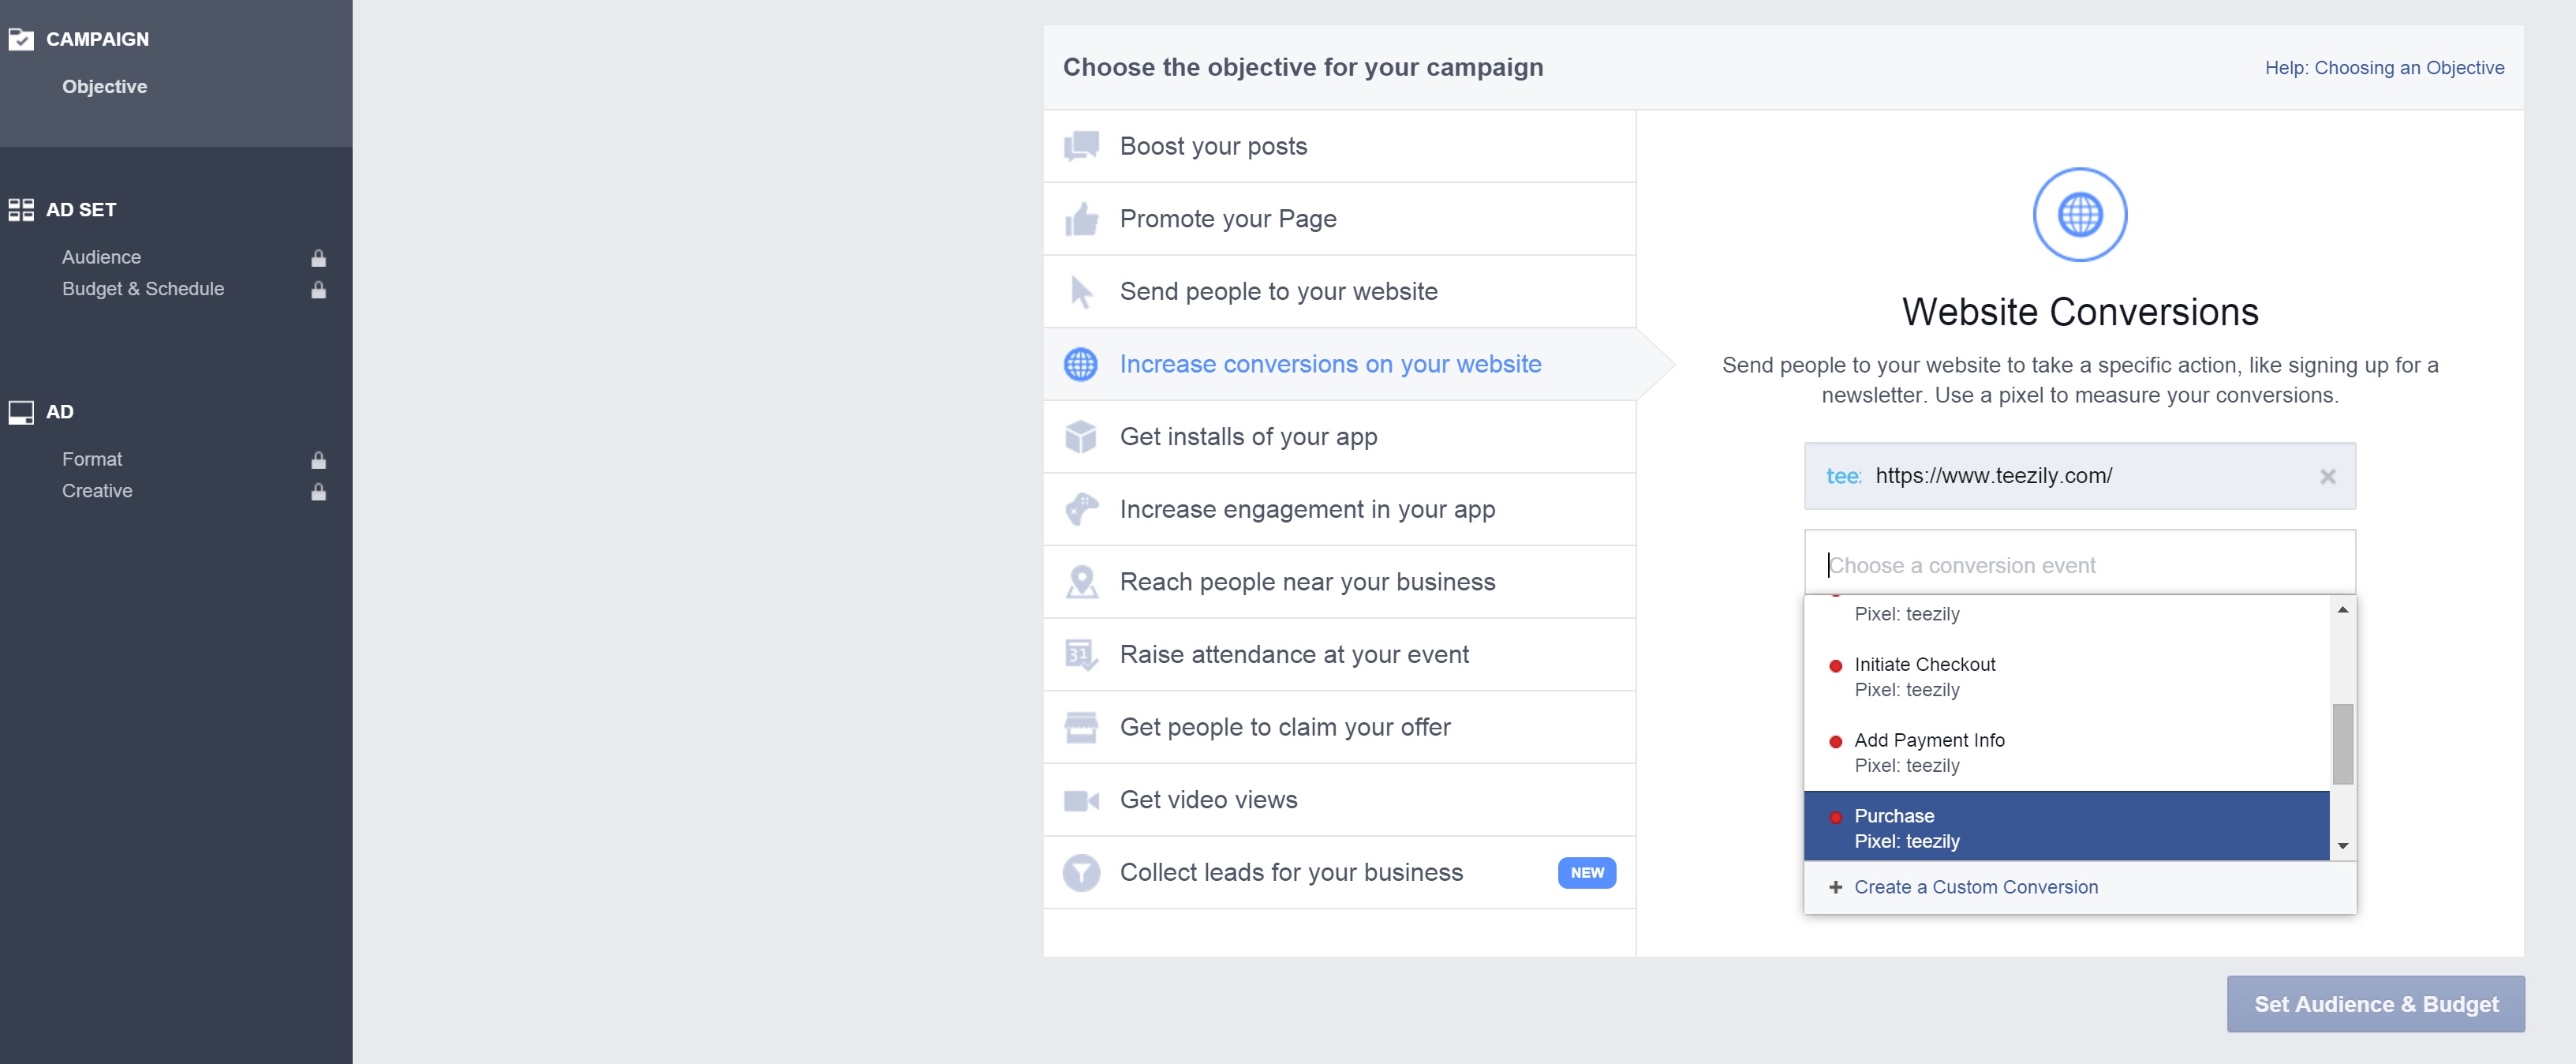
If you create a Website Conversions ad, choose the event where you want to optimise your Ad
-
The new Facebook pixel events
Via the new Facebook pixel, Teezily allows you to track 4 of the most important events:
ViewContent (visitors to your campaign)
AddToCart (visitors who click on the “buy” button)
InitiateCheckout (visitors that arrive on the “buy” page)
Purchase (the buyers)
-
Your new Facebook pixel statistics
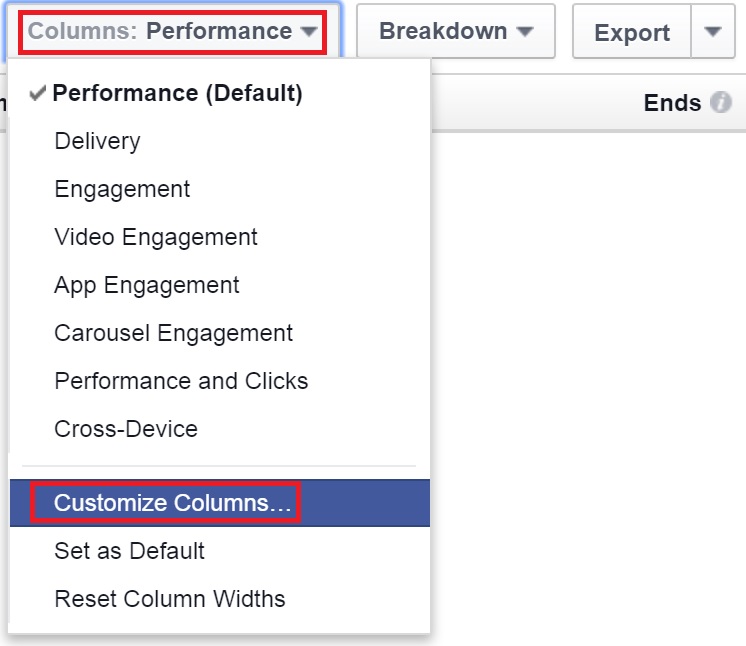
To view the statistics of your campaigns and adset, click on “Columns”, then “Customise columns” and in the section “website” click on the desired events

-
Retargeting with your new Facebook pixel
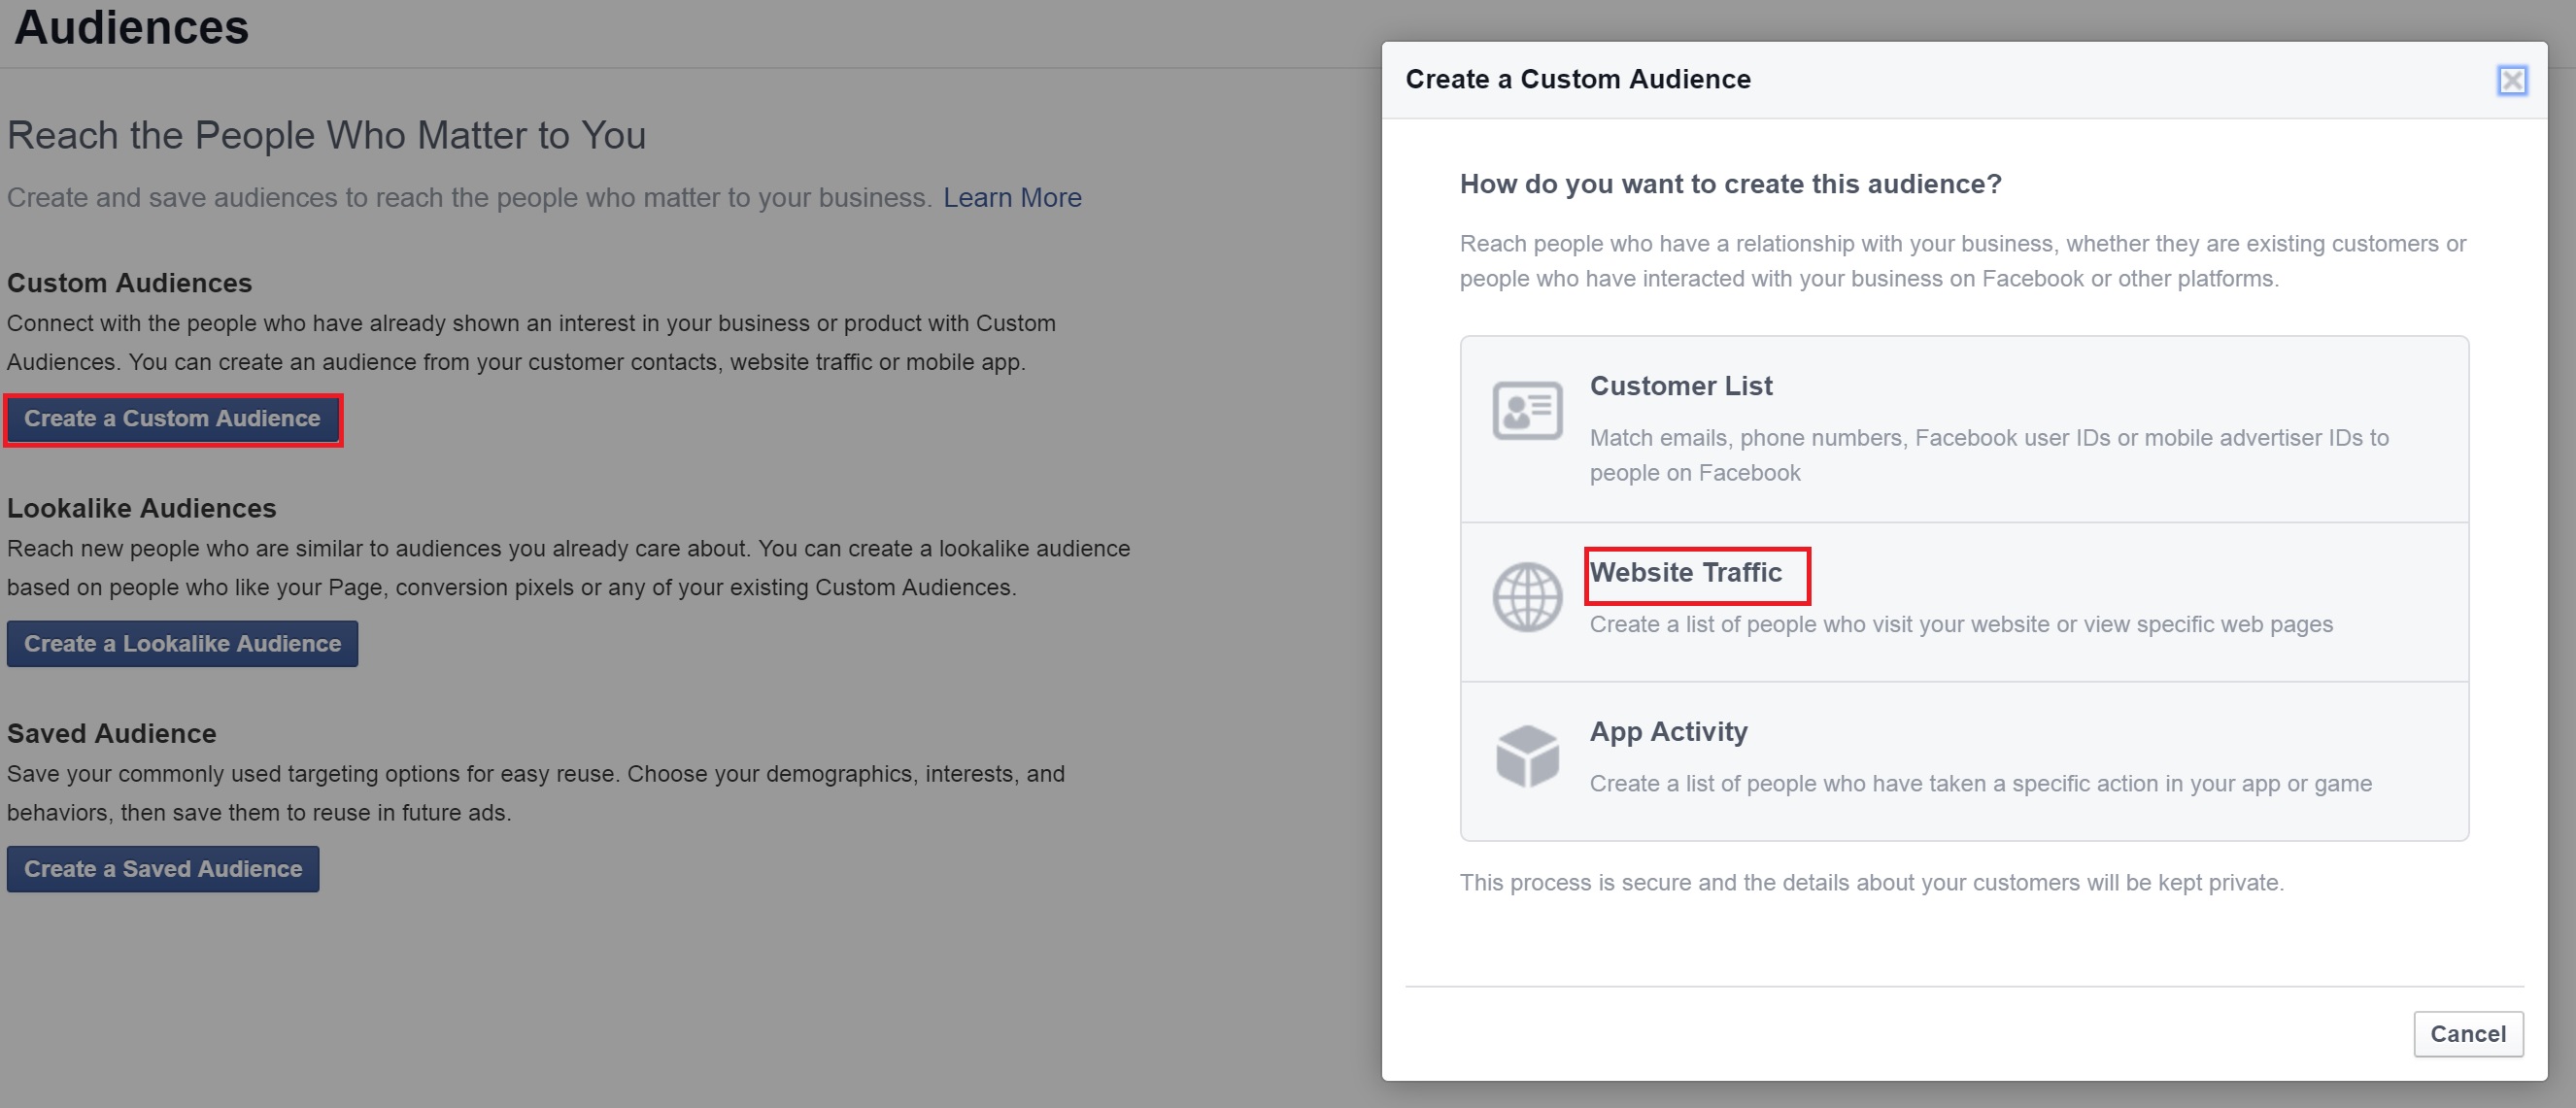
To create a retargeting audience with the new pixel, go to “tools” then “audience”, next choose “create custom audience” and click on “website traffic”
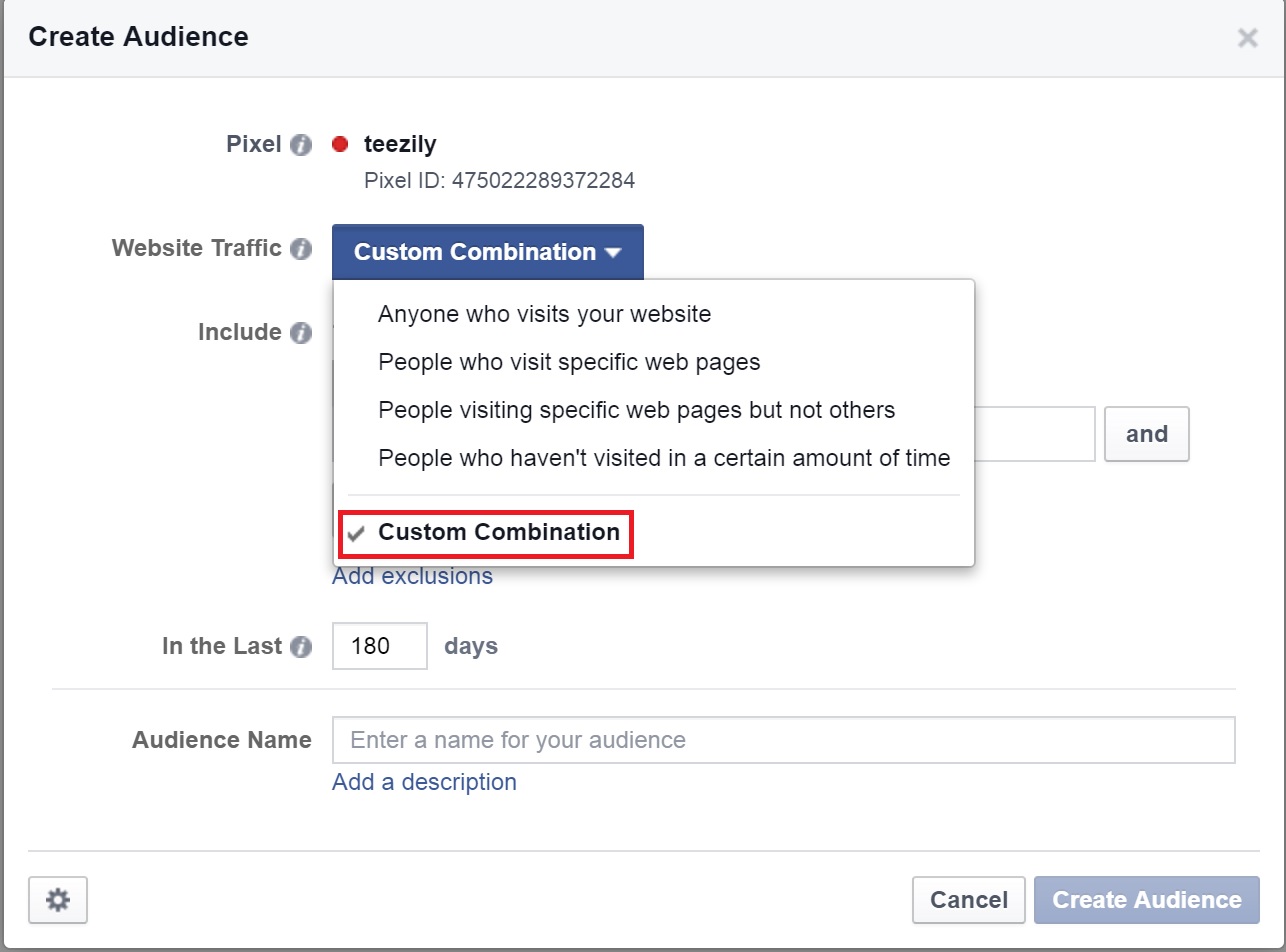
Select “custom combination”
Here you have two choices, you can either put the URL to your campaign excluding the “thank_you”page and select 180 days
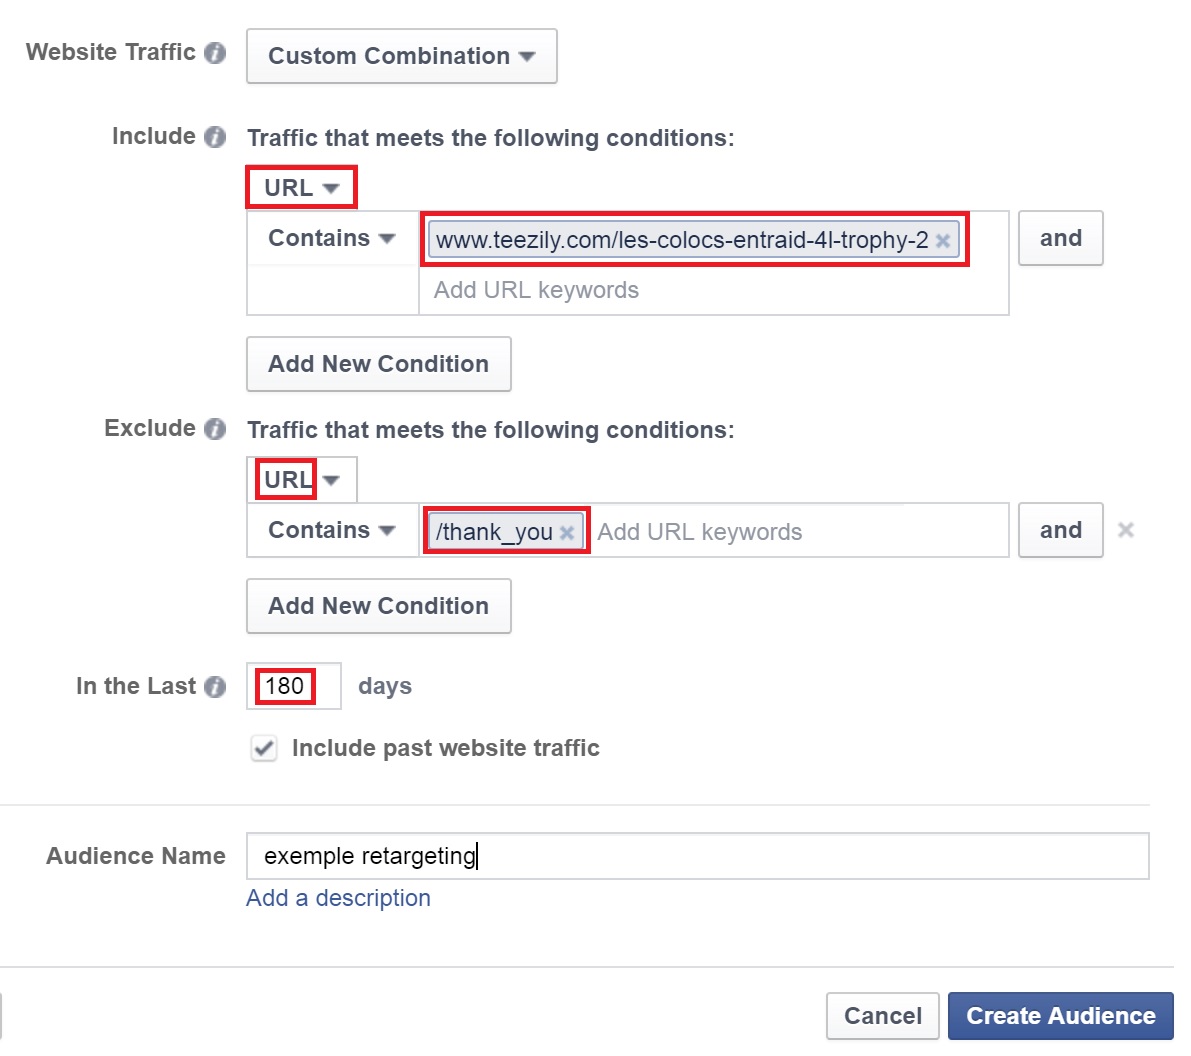
or you can choose the “ViewContent ” event, then in content_ids add everything that is included after the”/” of your Teezily campaign URL. The exlcude the event “purchase”

Note: You can create retargeting audiences for all of the events…